How to Create a Bootable USB Drive Using Rufus
Creating a bootable USB drive is the most efficient way to install a fresh Operating System (like Windows or Linux) on your computer. While there are several utilities available, Rufus stands out as the fastest, lightweight, and most reliable tool for the job.
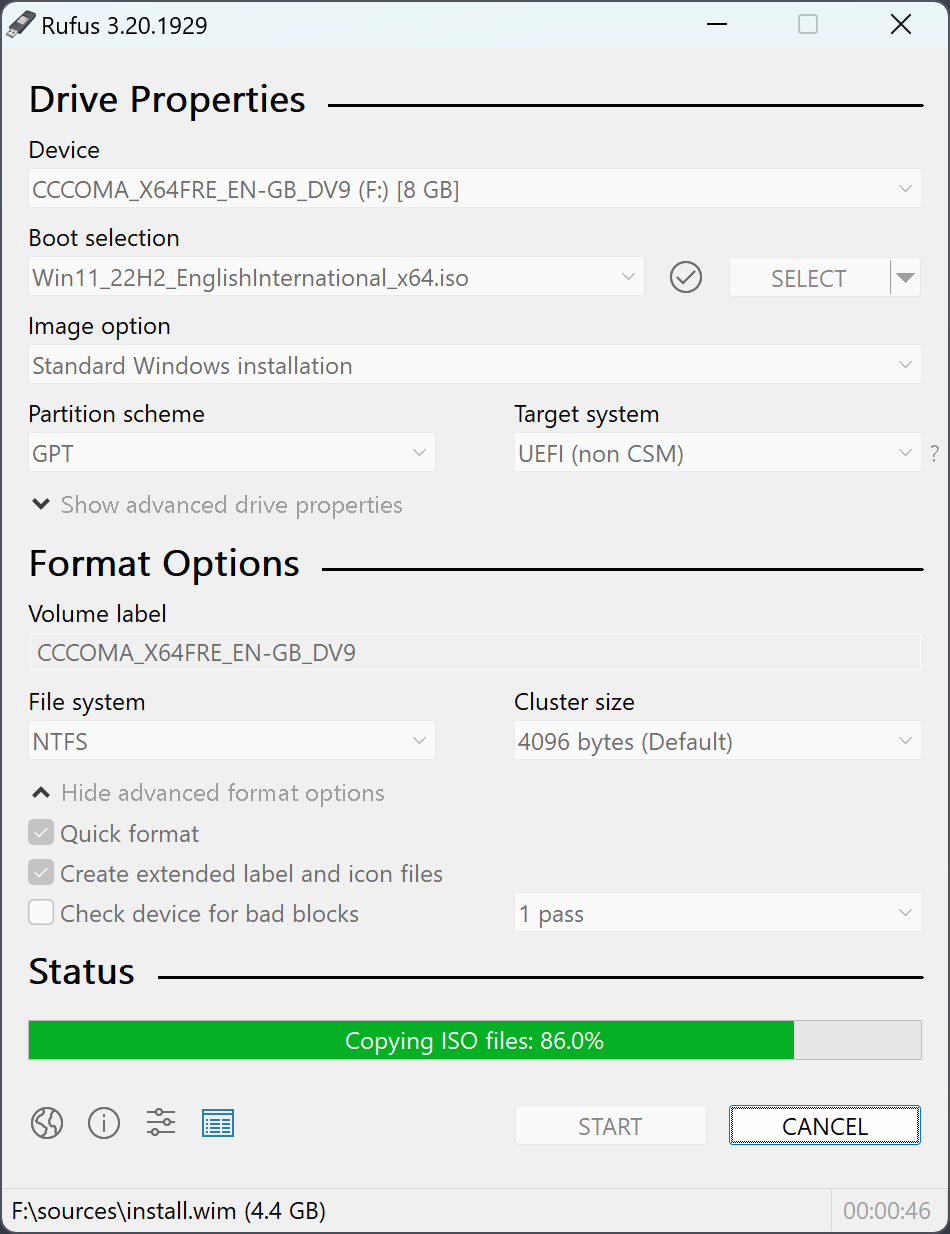
Figure 1: Standard layout configurations inside the Rufus interface.
Prerequisites
- A USB Flash Drive with at least 8GB capacity.
- An ISO image file of your target OS (e.g., Windows 10, Windows 11, or Ubuntu).
- The latest version from the official Rufus Website.
- Important: Back up all files on the flash drive; this setup completely wipes the storage.
Step-by-Step Instructions
- Launch the Tool: Insert your USB flash drive into your PC. Open the downloaded Rufus executable file (it runs immediately without installation).
- Select the Targeted Drive: Choose your flash drive from the Device drop-down menu at the top. Double-check the drive letter to avoid selecting the wrong drive.
- Load the ISO File: Set the Boot selection option to Disk or ISO image. Click the SELECT button on the right to browse and select your downloaded OS ISO file.
- Pick the Partition Scheme: Select either GPT (strongly recommended for modern UEFI-based machines) or MBR (for legacy BIOS setups).
- Configure File System: Leave the parameters at their automatic defaults. Rufus generally assigns NTFS for Windows images and FAT32 for Linux-based media.
- Initiate Writing: Click the START button situated at the very bottom of the window panel.
- Confirm Format: Click OK when the data loss alert prompt appears. The utility will begin styling the partitions; wait for the progress bar to fill and status text to return to "READY".
Process complete! Your bootable USB pendrive is ready to deploy your new operating system.